
WordPress Blocks 101 – The Basics

The Gutenberg block editor was met with controversy when it was introduced in WordPress 5.0 in December 2018. You either loved the addition of blocks or hated them, and some folks still hate it.
Many have yet to give blocks a whirl. Ran into several this week alone who are still on non-block themes.
Like life, change is a constant in technology. And here we are, eight years later, and there are still those avoiding blocks. So my advice, especially after all this time, is to embrace it.
I’ve always been open to new ideas and have jumped into using blocks—you can read all about it here. History shows that the only way to go is forward.
As WordPress transitions to Full Site Editing, you too should also adopt blocks. Today, we’ll cover the basics—an orientation to help you understand how to use blocks in WordPress.
What Exactly Are Blocks?
Previously, you had to designate paragraphs, headings, images, columns, and bulleted lists in HTML as you created your content. Back in the day, you needed to know the HTML tags to achieve the desired formatting.
WordPress included a visual WYSIWYG (What You See Is What You Get) editor with intuitive buttons, allowing users to create these layouts without needing to know the code. However, incorrect use could cause problems, such as bloated code, broken code, and layout issues.
Due to some resistance, WordPress offered the Classic Editor plugin to maintain the status quo, with no changes. However, with that, folks fell behind in embracing the inevitable—it is time to discard the Classic Editor and move into the future.
Enter the Gutenberg Editor
Each element of your content is now a block. Want a new paragraph? Use a paragraph block. Need to add a headline? Use the Headline block. Bulleted list—yep, list block.
What’s neat about blocks is that they have settings that allow you to customize them further. This was not available with the visual editor, and you needed to know code to extend it further (HTML or CSS).
Now, you can choose from the available blocks on the left by clicking the plus sign. You also have a plus sign icon to click on to search the available blocks within your post. Themes, such as Kadence, which I use, offer a bunch of cool blocks in addition to the standard WordPress blocks.
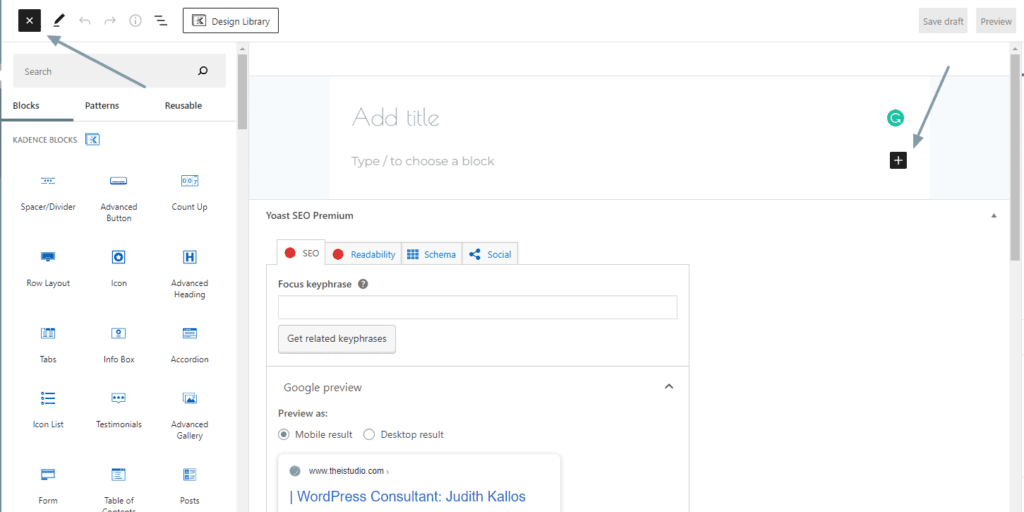

Example of basic blocks to choose from:
The sidebar on the right of the screen, when you are on a post or a page, contains tools and customization options for each block. Once you are on the Block panel, you can further customize the content of your block.
Reusable Blocks
Now this is cool. Once you customize a block, you can save it as a reusable block that you can add later with just a click.
Block Toolbars
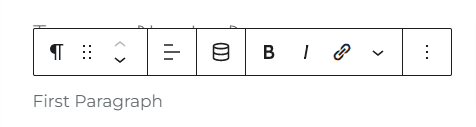
Each block has its own toolbar of options, which will display above it. For example, here’s the paragraph toolbar:
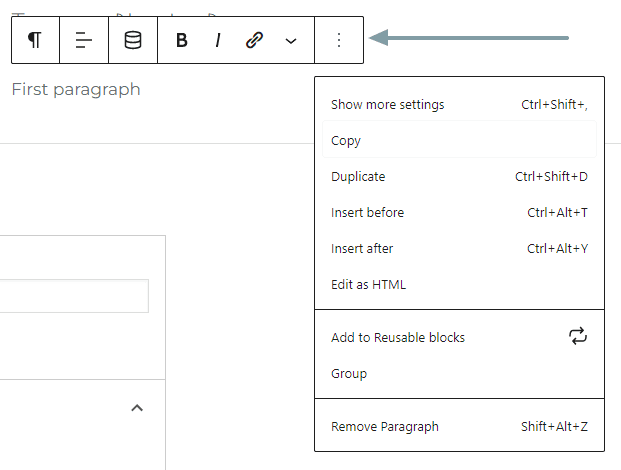
Personally, I prefer to have the toolbar options at the top of the page. However, you can uncheck that option by clicking on the three dots in the top right on each page and post. Unchecking “Top toolbar” will display the options menu above each block once you select it.
You can also drag the block to reposition it on the page by clicking the six dots or the up/down arrow. Next comes alignment, dynamic content, bold, italics, link, and additional formatting tools, and the last three dots offer even more options. Just for that paragraph!
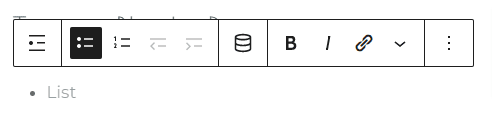
Here’s the toolbar and sidebar for lists:
List Block Toolbar
List Block Sidebar Tools

Know Your Options
As you can see, you have several options depending on the block you are using. Becoming familiar with these options allows you to customize each block to your liking.
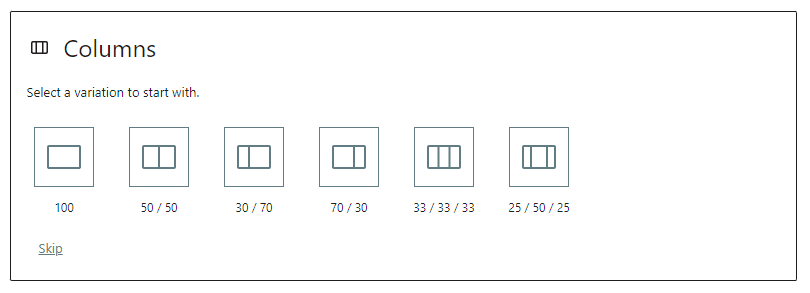
To get the above layout, I used the column block. In the left column, I used a Header, Image, and List block; in the right column, I used a Header block and an image block. The fancy icon checkmarks in my lists are courtesy of the Kadence Pro Icon list block, which has many styling options.
When selecting the column block, you can choose the number of columns and spacing. Next, you load up each column with the blocks you want—one or several.
There is no need to know any code to customize each block. Pretty cool, right? However, if you require further customization not offered in each block, an Advanced tab is available, where you can input additional CSS.
Transform a block?
Let’s say you started a block as a paragraph and then decided the content would be better displayed in a list. Then, you can transform it by clicking on the toolbar icon for that paragraph!
More Blocks
You can install block plugins on your website to add even more block options and make your website content precisely how you want it. Here are a few that I’ve used and can recommend:
- Kadence Blocks Pro — part of the Kadence Pro Membership
- Gutenberg Blocks – Ultimate Addons for Gutenberg
- Page Builder Gutenberg Blocks – CoBlocks
- Ultimate Blocks – Gutenberg Blocks Plugin
Experiment, Test, and Play
Create a page or post that you leave in draft mode to get your feet wet. Then, click around, add blocks, and become familiar with all the available tools. When unsure whether a block will fit the bill, open that draft to test it until you are comfortable.
There is no way to detail all the available blocks and possibilities. With this article, I aim to help you adopt a new approach to creating your website’s content and layout, enabling you to stay current with the times.
Once you “get it” and the light bulb goes off, you’ll wonder, just like me, how I ever lived without blocks. So click around and play; you won’t break anything, and that’s how we all learn.
What are you going to create today?
At your service,

*Some of the links on this page are to companies with which I have a professional affiliation.
Read my complete affiliate statement here.
